The Customer Portal allows you to quickly create an auto payment request for a payable invoice or contract. To do so, navigate to Invoice & Payments > Manage Autopay.
Alternatively, you can also use the Enroll in Autopay option from the Dashboard or the Set Up Auto Pay option under Quick Actions.
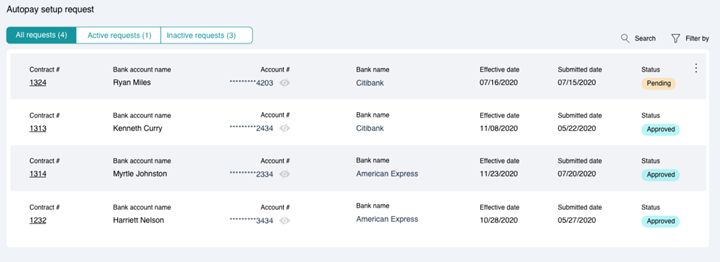
The Autopay Setup Request page displays a list of recurring ACH payments that have already been created by you. Using the tabs, you can either choose to view all autopay requests, only active requests, or only the requests that are inactive, respectively.
To create a new autopay request, click the ENROLL IN AUTOPAY button from the bottom-right corner.
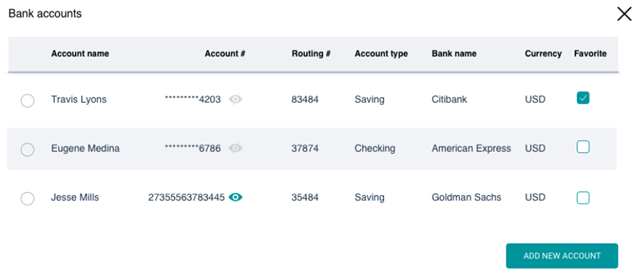
This displays a list of the active bank accounts associated to your Lessor, along with supporting information regarding the account as follows:
Adding a new bank account
In case the required account is not present in the list, you can add a new bank account using the ADD NEW ACCOUNT button.
- Select the required bank account for which you wish to setup automated payments.
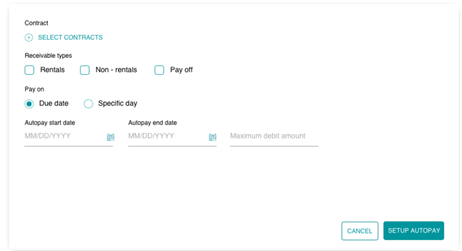
- Click SELECT CONTRACTS and choose the applicable contracts.
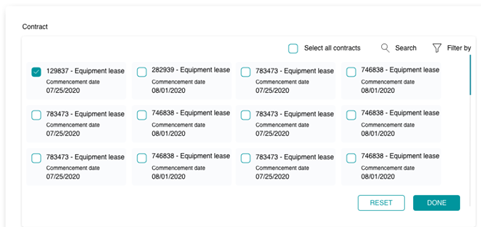
Selecting, Searching and Filtering
You can use the Select all contracts option to automate payments for all contracts, or Search or Filter specific contracts.
- Select the required Receivable Type applicable for the recurring payment.
- Under Pay On, select the frequency of the recurring payments, either on the Due Date or on a Specific Day of the month.
- Add the Autopay Start Date and Autopay End Date, along with the Maximum Debit Amount that should be allowed for each recurring payment.
- To create the autopay request with all the entered details, click SETUP AUTOPAY.
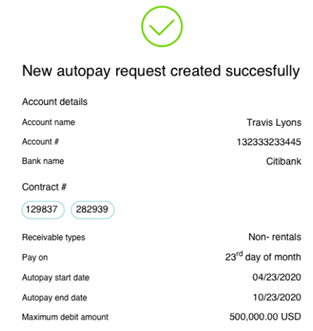
On success, a recurring ACH request will be created in the Lessor’s portal, along with a confirmation message displayed to you as follows: