Viewing and Editing a User
Who is this applicable to?![]() Portal Administrator, Super User
Portal Administrator, Super User
The Portal Administrator role facilitates you to manage all the accounts for the customer portal. You can view a user’s profile by navigating to Admin > Users. Click ![]() corresponding to the required user. This opens the Edit User tab.
corresponding to the required user. This opens the Edit User tab.
Here, you can perform the following actions:
- Edit user information
- Activate/inactivate a user
- Block the user’s access
- Reset user’s password
- Adding additional entities
Click ![]() to save any changes made to the user profile.
to save any changes made to the user profile.
Editing user information
The Personal Details section allows you to edit the editable fields such as First name, Last name, Email and Phone number as required.
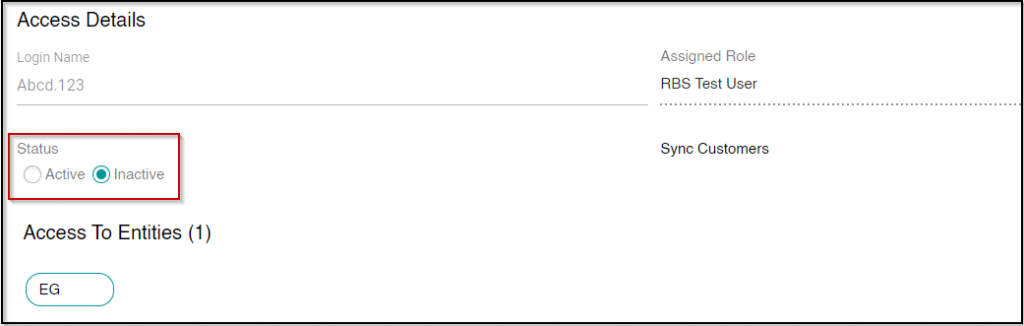
Similarly, the Access Details section allows you to change the role to be assigned to the user.
Lastly, you can also choose to change the user’s Profile Picture by clicking the camera icon on the left and uploading the required image. You can optionally also choose to drag-and-drop the required image onto the Profile Picture section.
Activating or inactivating a user
The Access Details section allows you to configure the status of the user.
Here, you can choose to inactivate or activate a user by making the appropriate selection.
TIP
Inactive users are highlighted in red on the Users tab.
Blocking a user’s access
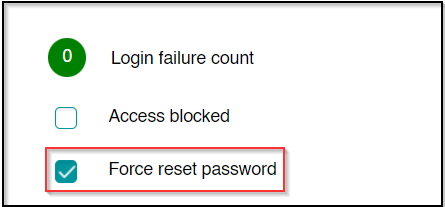
Incase the need arises to block a specific user’s access to the Customer Portal, you can do so using the Access Blocked checkbox on the left.

Resetting a user’s password
In case the user forgets the password and can’t sign in, you can choose to reset their password from the Edit User tab.
- Select the Force Password Reset checkbox.
- Click
 on the bottom right.
 - Now, contact your security administrator to run the Notification job.
NOTE
If your security administrator has scheduled a recurring Notification job, then the user will immediately receive an email notifying them about the temporary password.
Adding additional entities
Based on the Role of the user, select the appropriate tab.
Under Access to Entities, the entities associated with the Portal Admin are listed. You can also choose to add additional entities. To do so,
- Click

- Select the required entities.
- Click
 to add the selected entities.
In case you wish to delete the imported customer, click ![]() on the entity name.
on the entity name.
Under Access to Entities, the entities associated with the Portal Admin are listed. You can also choose to add additional entities. To do so,
- Clear the Sync Customers checkbox.
- Click Select Entities.
- Select the required entities.
- Click OK to add the selected entities.
In case you wish to delete the imported customer, click the cross icon on the entity name.
Editing TFA Details
Under the TFA Details, choose between Authenticator App and Email.
Upon clicking ![]() , you will receive a success message as follows:
, you will receive a success message as follows:
