Creating a Role
Who is this applicable to?![]() Security Administrator
Security Administrator
In the Customer Portal, users cannot access resources directly, but can only do so through their Role (or Roles). Each user needs to be assigned a Role, and the creation and management of such roles belongs to the Security Administrator. To create a new Role, perform the following steps:
- From the main menu on the left, navigate to User Management > Users > Roles.
- In the Roles tab, click
 .
. - Enter the Name of the role.
- Select the Role Function from the dropdown list, followed by the Default Permission.
To know more about the Roles, click here.
The following table gives you a brief description of each role:
| Role | Role Function |
| Portal Admin | Portal Admins have the ability to add and manage Portal users along with the other functionalities of Portal users |
| Portal User | Portal Users can view all your invoices in one place, make your payments, view the details of the contracts, request the change of an asset location, initiate a payoff quote for contract closure and so on. |
To know more about the Default Permissions, click here.
The following table gives you a brief description of each permission:
| Default Permission | Description |
| Full | The user will have full access to the data. |
| None | The user will not have access to any of the Customer Portal data. |
| Read | The user will have read-only access to the data. |
| Site-level Default | The user will inherit the default permission configured by the Lessor at the site level. |
- Next, enter the Description for the role, followed by Validation Override Level.
- Click
 to select the Activation Date.

- With all the details filled in, click
 at the bottom of the tab to create the role.
NOTE
In case of errors, you can choose to override the warnings by selecting the Override warnings checkbox at the bottom of the tab, and clicking Submit once again.
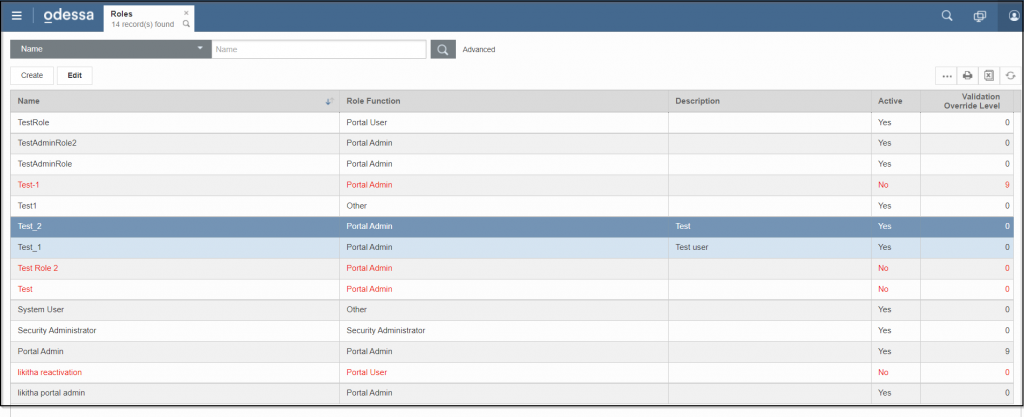
All the Roles that have been created in the system can be viewed in the Roles tab as follows: