Adding Documents to the Portal
Who is this applicable to?![]() Portal Administrator, Portal User, Super User
Portal Administrator, Portal User, Super User
Every contract in the system requires some documents to be added by you as well as by the lessor. The Documents option in the Customer Portal stores all the contract-related documents in one place. You can upload documents like the Rental agreement, Payment statement, ID proof, and so on. These documents can be accessed by your lessor as well.
You can choose to add your documents to the Customer Portal in any one of the following ways.
From the main menu header, navigate to Contracts > Documents. This opens the Documents tab.
- From the main menu header, navigate to Contracts > Contracts. This opens the Contracts tab.
- Click
 corresponding to the contract to which you want to associate your documents to and click Documents.
You can also choose to view all the contract details by clicking
Click ![]() This opens Documents for Contract # window.
This opens Documents for Contract # window.
Once on the Documents page, perform the following actions:
- Click
 from the bottom-right corner.
 - In the Add New Document window that opens on the right, begin by selecting the Document Type.
- If selected Document Type is of contract, then choose the Entity Details that should be associated to the document.
NOTE
If you are accessing the Add New Document window from the Contracts tab or from the Contract Details tab, upon selecting the Document type, Entity Details information will be auto-populated.
- Click
 and select file to upload.
 - Optionally, you can add the supporting comments for the document, if any.
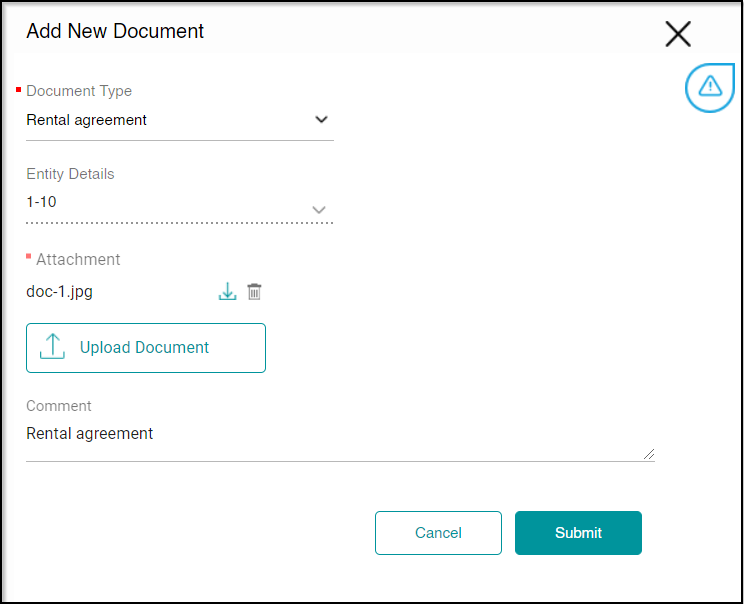
- Click
 to add your document to the portal.
You can view the uploaded documents in the Documents tab by navigating to Contracts > Documents.
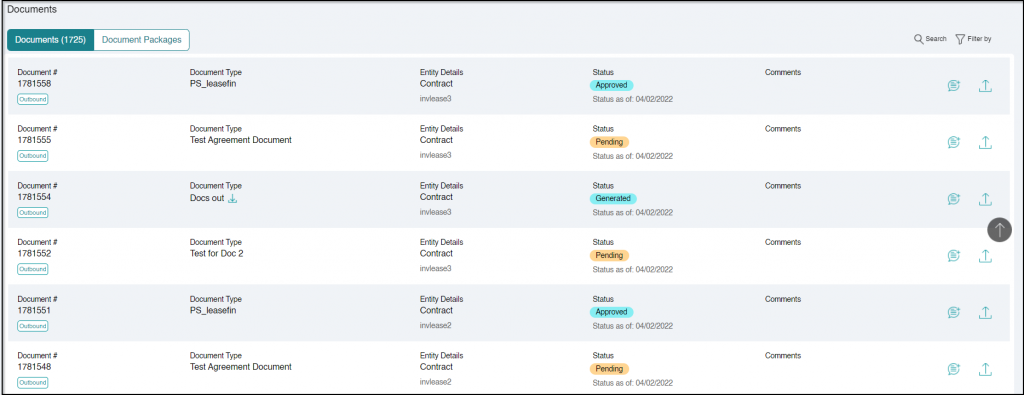
In case you need to upload additional files to an existing document or document package, you can do so using the ![]() icon for the required document.
icon for the required document.